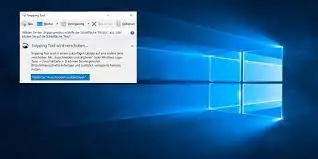
In today’s digital age, the ability to capture and share information seamlessly is more important than ever. Whether you’re a student needing to save an important passage from an online article, a professional needing to share screenshots for a presentation, or just someone who wants to capture moments from their digital life, having the right tools at your disposal is crucial. One such tool that often goes underutilized is the Snipping Tool, a simple yet powerful utility built into Windows operating systems that allows users to capture screenshots with ease.
What is the Snipping Tool?
The Snipping Tool is a built-in screenshot utility included in Windows Vista and later versions, including Windows 7, 8, 8.1, and 10. It provides basic screenshot capturing capabilities along with some simple annotation features. This tool enables users to capture any portion of their screen, whether it’s a specific window, a selected area, or the entire screen, and save it as an image file. Its intuitive interface and straightforward functionality make it an invaluable tool for a variety of tasks.
How to Access the Snipping Tool
Accessing the Snipping Tool is a breeze. Here’s how to do it:
- Search for the Snipping Tool: Simply type “Snipping Tool” in the Windows search bar, and it should appear in the search results. Click on it to open the application.
- Use the Start Menu: You can also access the Snipping Tool through the Start menu. Navigate to Start > All Programs > Accessories > Snipping Tool.
- Pin it to the Taskbar: If you frequently use the Snipping Tool, you can pin it to your taskbar for quick access. Right-click on the Snipping Tool icon in the Start menu and select “Pin to taskbar.”
Once you’ve opened the Snipping Tool, you’re ready to start capturing screenshots.
Capturing Screenshots
Capturing screenshots with the Snipping Tool is a straightforward process. Follow these steps:
- Open the Snipping Tool: Use one of the methods mentioned above to open the Snipping Tool.
- Select the Snip Type: Click on the “New” button to initiate a new snip. You’ll be presented with several options:
- Free-form Snip: Draw any shape around the object you want to capture.
- Rectangular Snip: Drag the cursor to form a rectangle around the area you want to capture.
- Window Snip: Select a specific window to capture.
- Full-screen Snip: Capture the entire screen.
- Capture the Screenshot: After selecting the desired snip type, simply click and drag to capture the area you want. Release the mouse button once you’ve captured the desired area.
- Annotate (Optional): If you want to annotate or highlight parts of the screenshot, you can use the available tools in the Snipping Tool, such as the pen or highlighter.
- Save the Screenshot: Once you’re satisfied with the captured image, click on the “File” menu and select “Save As” to save the screenshot to your desired location.
Advanced Features and Tips
While the Snipping Tool is relatively simple to use, there are some advanced features and tips that can enhance your screenshot capturing experience:
- Delay Feature: The Snipping Tool allows you to set a delay (up to 5 seconds) before capturing the screenshot. This is useful when you need to capture context menus or other dynamic elements on your screen.
- Keyboard Shortcuts: You can use keyboard shortcuts to quickly initiate a new snip:
- Ctrl + N: Create a new snip.
- Alt + M: Choose a snipping mode.
- Ctrl + S: Save the snip.
- Send Snip via Email: You can directly email your captured snip by clicking on the “Send Snip” button and selecting an email client.
- Integration with OneNote: If you use Microsoft OneNote, you can send your captured snips directly to OneNote for easy organization and sharing.
Conclusion
The Snipping Tool is a versatile and user-friendly tool that simplifies the process of capturing and sharing screenshots on Windows systems. Whether you’re a casual user or a professional, mastering the Snipping Tool can greatly enhance your productivity and communication capabilities. So next time you need to capture something on your screen, remember to give the Snipping Tool a try—it’s a powerful ally in the digital age.
Also Read: How to Choose a Digital Marketing Agency in Latin America


